Chalkboard paint has become quite popular. Unfortunately, its found on the expensive side. In my Chalkboard Basket Tutorial, I paid a little over $8 for a spray paint can size of chalkboard paint. I eventually used it all up, and have been needing some more for quite a while, but I just havent felt like spending so much on it! So, I went searching for a recipe. I knew I had to be able to make it, somehow, and chances were it would be a lot cheaper!
So here it is! Its fast, cheap, easy and works like a charm!!
All you need is some unsanded grout and some paint of any color!
Most recipes use a powder grout, but all I had on hand was the premixed stuff, which worked fine! I paid $4 at Michaels for this container of grout, and I'll be able to make a ton of chalkboard paint out of it!
The paint I already had on hand so no "fee" there. :)
Simply mix 1 Tablespoon of grout with 1/2 cup of paint. Make sure you mix it really well to get all the lumps and bumps out.
The next step is to paint obviously. Im going to be starting an herb garden soon so I figured what better way to mark the herbs than with a chalkboard painted terra cotta planter. Allow the paint to dry completely before moving on to the next step. My whole pot, plus 2 layers of paint was dry in less than 20 minutes.
Prep your fresh chalkboard surface by rubbing some chalk onto it then wiping it off.
Tada! Chalkboard paint for cheap! I cant wait to get more potters and get my herbs started!
Showing posts with label craft. Show all posts
Wednesday, May 23, 2012
Saturday, May 12, 2012
Mother's Day Craft!
So I'm a little late with this post, but! this project is super easy, super cute, and can be done right now! Gather up your littles, some paint and some paper. Youre about to make the best bouquet of Mothers Day flowers, the kind that never die! We chose to do 3 different colored flowers. These cute little cards got
sent out to Lauryn's grandmothers for Mothers Day. They all loved them!
Heres what you do...

1. Dip your childs hand in the lightest color paint you have (we did yellow first, then red, then purple). You could also use a paintbrush to apply the paint to your kiddos hand, which is what we did, it makes things a lot easier!
2. Have them do an open hand stamp onto the piece of paper. Then proceed with the next 2 (or more) colors.
3. Allow the handprint flowers to dry, then using a small brush, paint on flower stems, and leaves.
4. Once the stems and leaves are done, paint a pretty bow around the flowers, giving the illusion of them being tied together in a little bouquet.
Tada! The whole project took us about 20 minutes from start to finish. Cute, easy, and in my book, a better bouquet of flowers than any amount of money could buy!
1. Dip your childs hand in the lightest color paint you have (we did yellow first, then red, then purple). You could also use a paintbrush to apply the paint to your kiddos hand, which is what we did, it makes things a lot easier!
2. Have them do an open hand stamp onto the piece of paper. Then proceed with the next 2 (or more) colors.
3. Allow the handprint flowers to dry, then using a small brush, paint on flower stems, and leaves.
4. Once the stems and leaves are done, paint a pretty bow around the flowers, giving the illusion of them being tied together in a little bouquet.
Tada! The whole project took us about 20 minutes from start to finish. Cute, easy, and in my book, a better bouquet of flowers than any amount of money could buy!
Thursday, April 26, 2012
Crafted a Bird Feeder
We're finally moved and somewhat settled in our new apartment. Still a few boxes to unpack and quite a bit of organizing to do but we're getting there! We're still waiting for our wireless internet, let me tell you, I dont miss the days of being tied down to the ethernet cable AT ALL!
We have a nice little balcony off of our living room and the first morning we woke up here, I saw a few birds perched on the railing. So I thought, how neat would it be to put up a bird feeder? Plus I knew Lauryn would LOVE looking out the sliding glass door and seeing them! So I devised a plan and set off for Walmart! It was a super cheap project and looks nice. Im contemplating painting the bird feeder eventually but for now, it will do as is.
Materials Needed:
10 inch surface protector ring (-)$3
8 inch terra cotta planter plate $2.15
A roll of Jute twine $3
Bird seed $4
Drill
Scissors
Ceiling hooks or a way to hang the feeder when finished
First I drilled a small hole in each of the legs of the surface protector ring. This took quite a bit of effort because the plastic was so strong but I eventually got through it.
Next, make a web with your jute twine. It doesnt have to be fancy, its just going to be used as a resting place for the planter plate.
I then measured 6 24inch long pieces of jute. I tied the twine to another piece of twine coming out of each hole. Pull your strings up and bring them together in the middle. Tie a knot near the top of the jute. This is where your feeder will hang from.
We were able to use 2 metal hooks and screw them into the roof of our balcony. Its pretty darn sturdy! Although if we happen to get any bad storms, Ill at least take the planter plate off and set that aside. Wouldnt want that falling off the third floor!
Fill your planter plate with bird seed (Ill be making my own once this bag is empty!) and voila! Youve just made a bird feeder for about $12! I cant wait to snap a picture of the very first visitor!
Again, now that were getting more and more settled each day, Im hoping to be able to get back at this! Ive come up with a ton of new ideas during my break and I cant wait to share them with you! So stay tuned!
We have a nice little balcony off of our living room and the first morning we woke up here, I saw a few birds perched on the railing. So I thought, how neat would it be to put up a bird feeder? Plus I knew Lauryn would LOVE looking out the sliding glass door and seeing them! So I devised a plan and set off for Walmart! It was a super cheap project and looks nice. Im contemplating painting the bird feeder eventually but for now, it will do as is.
Materials Needed:
10 inch surface protector ring (-)$3
8 inch terra cotta planter plate $2.15
A roll of Jute twine $3
Bird seed $4
Drill
Scissors
Ceiling hooks or a way to hang the feeder when finished
First I drilled a small hole in each of the legs of the surface protector ring. This took quite a bit of effort because the plastic was so strong but I eventually got through it.
Next, make a web with your jute twine. It doesnt have to be fancy, its just going to be used as a resting place for the planter plate.
I then measured 6 24inch long pieces of jute. I tied the twine to another piece of twine coming out of each hole. Pull your strings up and bring them together in the middle. Tie a knot near the top of the jute. This is where your feeder will hang from.
We were able to use 2 metal hooks and screw them into the roof of our balcony. Its pretty darn sturdy! Although if we happen to get any bad storms, Ill at least take the planter plate off and set that aside. Wouldnt want that falling off the third floor!
Fill your planter plate with bird seed (Ill be making my own once this bag is empty!) and voila! Youve just made a bird feeder for about $12! I cant wait to snap a picture of the very first visitor!
Again, now that were getting more and more settled each day, Im hoping to be able to get back at this! Ive come up with a ton of new ideas during my break and I cant wait to share them with you! So stay tuned!
Wednesday, February 29, 2012
Decorating the Home
This was my inspiration! It was one of the first "pins" I made last year when I signed up for pinterest. I wanted to recreate this so badly! So I finally did!
We already had the buffet table and mirror, which saved us quite a bit of money. But I'm sure you could find something similar at a thrift store! I found my matching lamps and shades at Walmart. To make the planter, I used a wooden pallet, which I picked up for free at Home Depot. We cut the pallet to size and used nails to make the planter. I then bought floral foam rectangles, which conveniently ended up being the exact width of my planter, from Michaels. I used 3 of the foam pieces to fill the bottom of the planter, then bought, cut to size and "planted" my hydrangeas. Voila! So simple and I love the look!
Saturday, February 18, 2012
Easy Water Bombs
Our daughter loves bathtime. She would spend hours in the tub if we would let her. I'm always on the lookout for new bath toys, especially ones that double as learning toys! I found an easy peasy bath toy craft and I had to give it a try myself!
And there you have it. Super simple water bombs. Lauryn got more of a kick out of these things dry than she did in the bathtub They'll be fun in the summer when we canviolently throw toss them at each other to cool off. Plus they're bound to help her learn colors!
All you need is: A pack of sponges, just be sure they are the ones without the scrubby pad! That could be painful. A pair of scissors, and some fishing line!
First, cut your sponge in half lengthwise.
Then cut each half into half. Basically you want to quarter your sponge lengthwise. I also trimmed off the wavey parts from my sponge. Try to find straight sided sponges, I had no luck. Do this for all of your sponges.
Make a stack 2 sponges high, 4 sponges wide (this was before I trimmed my wavey sides), alternating colors. And slip a piece of fishing line underneath the stack of sponges. Tie the fishing line as tightly as you can, and trim the excess line. Do this for the remaining sponges.
And there you have it. Super simple water bombs. Lauryn got more of a kick out of these things dry than she did in the bathtub They'll be fun in the summer when we can
Chalkboard Baskets
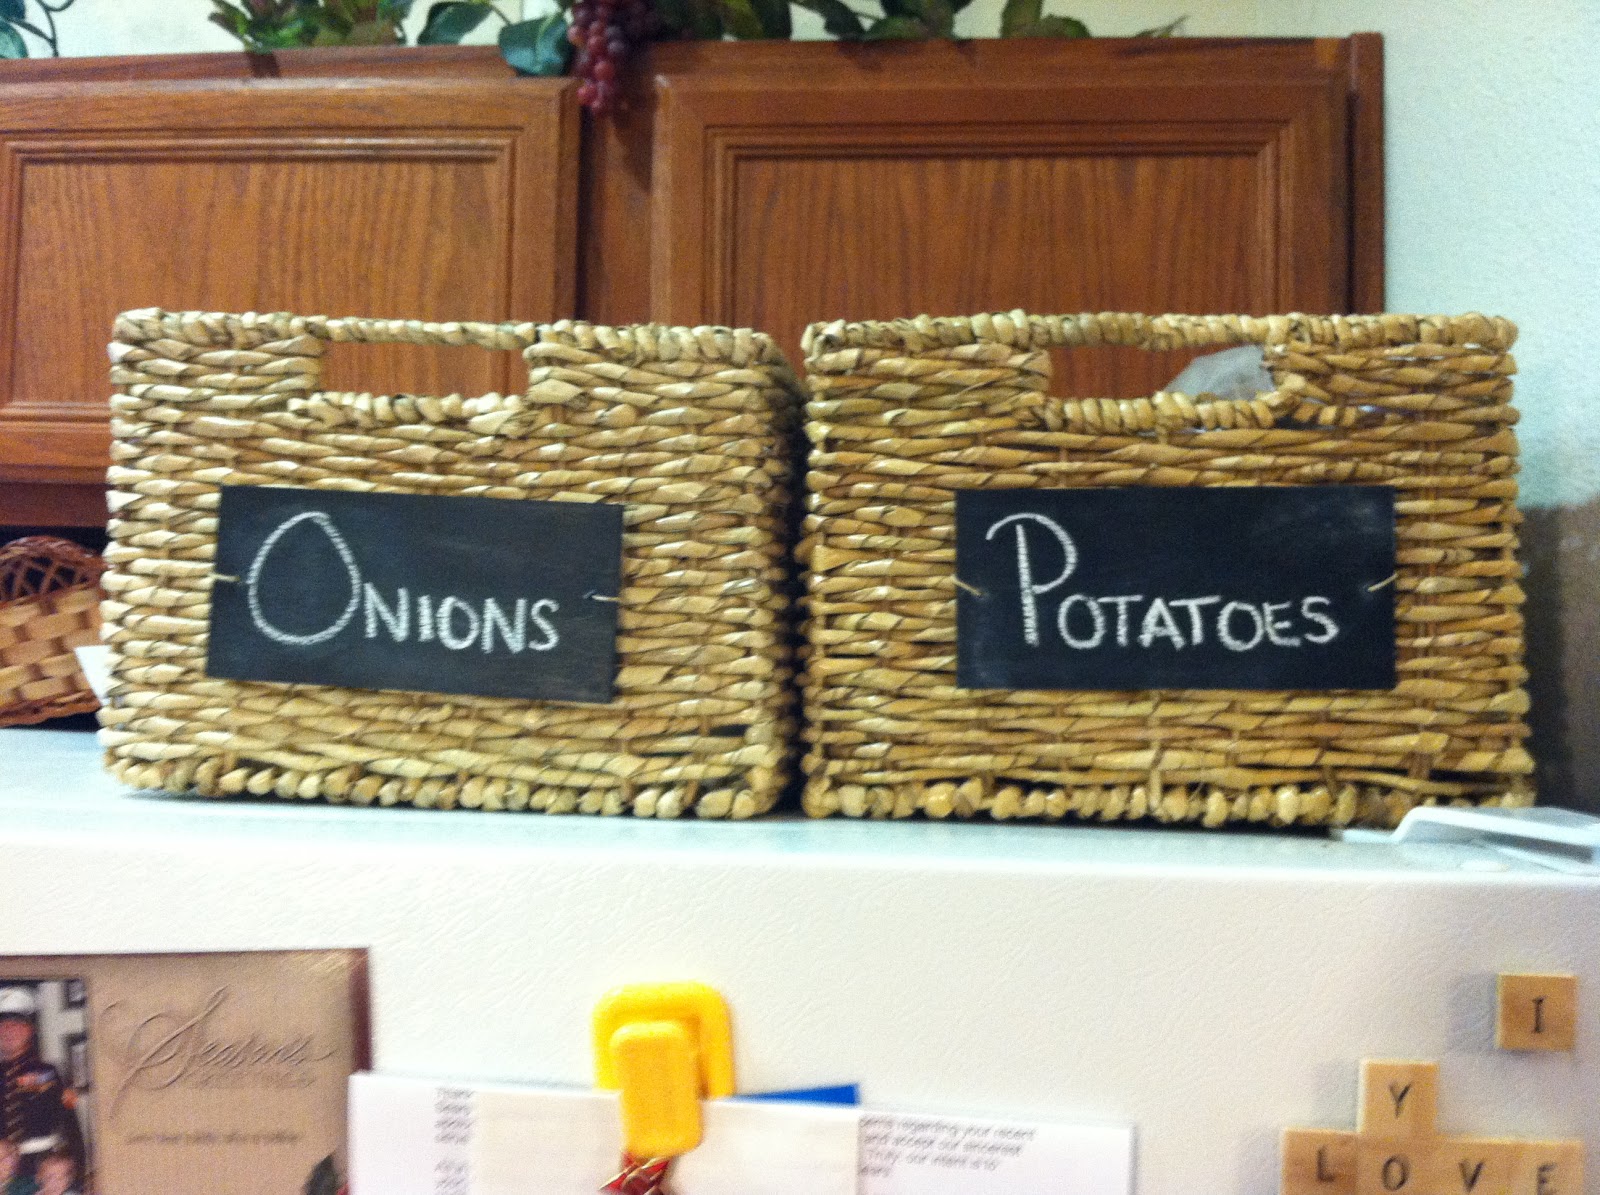
I love being organized. I love labels. And I love everything having it's own place to call home, and being IN that home. My OCD love this part of me. Remember how back at the menu board post I said how I was trying to get the refrigerator cleaned up? Well I am sick of bags of onions and russet, red, and sweet potatoes uglifying (is that even a word? no. I just made it one) the top of my refrigerator. I wanted needed a way to organize! I found these lovely chalkboard baskets, as seen above, at target for $39.99. The exact same amount I pay for 240 size 3 diapers. There was no way in H-E-double hockey sticks I was paying $40 for a basket I knew I could make myself! So after my target trip I made a trip to Michaels to find some materials.
This can of chalkboard paint, which you can make yourself, I haven't ventured into that just yet, was around $8. A little pricey but you know I'll be using it again!
I got a pack of 8 2x4inch wood pieces for under $5. I drilled 2 holes, one on each side, just big enough for my string to go through and sanded over the holes.
And I got 2 of these baskets. Originally they were $19.99 a piece but Michaels had them 40% off so I paid about $12 for each! SCORE!
I took my 2 wood pieces outside and sprayed them with the chalkboard paint. Follow the directions on your can of spray paint! My impatientness (look another new word) got the best of me and I didn't listen when it said to wait 24 hours before using for the first time, and I ruined my first 2 pieces of wood and had to start over. sigh.
Once youve waited the required amount of time, "break in" your chalkboard by rubbing chalk over the surface. Then wipe it clean with a chalkboard eraser, or paper towel.
I wrote on my chalkboards "onions" and "potatoes". Then fed the string though the pre-drilled holes. Place the chalkboard onto the face of your basket and secure it by tying the strings to the basket. Cut off any extra string.
BAM! Chalkboard baskets! Target wanted $40 for just one basket. I made 2 chalkboard baskets for well under $40!
Crafty mommy - 1 Overpriced Store - 0
winning.
Monday, February 13, 2012
Crayon Art!
These little pieces are so much fun to make and to look at! The playroom walls are bare, Lauryn is just simply not old enough to fill them with her lovely masterpieces yet! So to Pinterest I went! Melted crayon art is all over the place and people are coming up with more and more creative ways to melt crayons into beautiful pieces of art. I wanted just a simple rainbow effect so I was off to find some, hopefully cheap, canvases and crayons.
I managed to snag a 5 pack of 16x20inch canvases at Michaels for just $19.99! SCORE!!! If I had the extra space to store them, I would have bought 2-3 packs! Such a great deal! And Target had a box of 240 Crayola crayons for just $6.99. So I snagged up 2 of those as well.
First step, SORT YOUR CRAYONS! It was a pain in the butt, but it prevented the possibility of gluing a yellow crayon right next to a pink one. For a 20 inch long canvas, 58 crayons fill it from one side to the other. So I tried to split my 8 crayon colors as evenly as possibly between that 58. Then just start hot gluing them onto the canvas. Use caution, I can't even begin to tell you how many times I burnt myself doing this project. Every.single.time. Damn hot glue.
Tada. Crayon filled canvas! Once you get going, this part moves pretty fast.
Be sure to cover your work space with something, I just cut a garbage bag open and laid that over the counter and another for the floor. I made the mistake the first time around of not covering anything and spent a good 30 minutes remelting wax and wiping it off of my counter tops and floor. I didn't think it would splatter! Boy was I wrong! Once your workspace is covered go ahead and fire up your hair dryer. I used the high setting, which probably contributed to the splattering, but on low it took too long to melt. And I'm impatient. It's one of my faults. I'll admit it.
Once you have your wax melted, let it dry before you hang it. It doesn't take long to dry. Looks pretty neat, huh? The splattering did make for a cool effect on the bottom of the canvas.
Here are the 2 that I made for our daughters playroom. They definitely brighten it up a bit and were already starting to work on her colors so these will help!
I managed to snag a 5 pack of 16x20inch canvases at Michaels for just $19.99! SCORE!!! If I had the extra space to store them, I would have bought 2-3 packs! Such a great deal! And Target had a box of 240 Crayola crayons for just $6.99. So I snagged up 2 of those as well.
First step, SORT YOUR CRAYONS! It was a pain in the butt, but it prevented the possibility of gluing a yellow crayon right next to a pink one. For a 20 inch long canvas, 58 crayons fill it from one side to the other. So I tried to split my 8 crayon colors as evenly as possibly between that 58. Then just start hot gluing them onto the canvas. Use caution, I can't even begin to tell you how many times I burnt myself doing this project. Every.single.time. Damn hot glue.
Tada. Crayon filled canvas! Once you get going, this part moves pretty fast.
Be sure to cover your work space with something, I just cut a garbage bag open and laid that over the counter and another for the floor. I made the mistake the first time around of not covering anything and spent a good 30 minutes remelting wax and wiping it off of my counter tops and floor. I didn't think it would splatter! Boy was I wrong! Once your workspace is covered go ahead and fire up your hair dryer. I used the high setting, which probably contributed to the splattering, but on low it took too long to melt. And I'm impatient. It's one of my faults. I'll admit it.
Once you have your wax melted, let it dry before you hang it. It doesn't take long to dry. Looks pretty neat, huh? The splattering did make for a cool effect on the bottom of the canvas.
Here are the 2 that I made for our daughters playroom. They definitely brighten it up a bit and were already starting to work on her colors so these will help!
Friday, February 10, 2012
Menu Board
Menu Boards are HUGE right now. Pinterest is filled with so many different ideas for menu boards. I typically create a 2 week menu at a time and do all my grocery shopping at once, minus picking up some fresh veggies and fruits as we may need them. The list, written on a piece of boring school notebook paper hangs on our refrigerator and we eventually make our way through that list, and onto another. But I've honestly been trying to keep our fridge as uncluttered as possible, this is proving to be more difficult than I imagined so I figured I'd try to slowly find creative ways to remove items one at a time. Hence, the menu board! Armed with an idea and the debit card, I was off to Michaels!
I found this 8x10 frame on clearance! Originally $29.99, I bought it for $14.99. Still waay more than I like to spend on a picture frame but hey, I was determined and this frame would fit our Italian-Wine themed kitchen perfectly!
These are the sticker letters I purchased (for $6.99, sigh) for the menu board. Once again they fit the theme pretty perfectly!
I took out the piece of glass from the frame and put it on top of the scrapbook paper I was planning on using as the background. I had this piece laying around so it saved me from having to buy it tonight. SCORE! Anyway. I traced the outline of the glass to be sure that I would have the right sized paper for the frame. Be sure to use pencil for the tracing! It's light and erasable, perfect for mistakes.
I spelled out "menu" across the top of my paper, and then put one letter down the side for each day of the week. Then I cut the paper to fit the frame.
I reassembled the picture frame and VOILA! Wrote our menu for the next week on the glass with a dry erase marker, I'm in dire need of a new marker, and folded up and hid the 2 week menu behind the menu board.
I found this 8x10 frame on clearance! Originally $29.99, I bought it for $14.99. Still waay more than I like to spend on a picture frame but hey, I was determined and this frame would fit our Italian-Wine themed kitchen perfectly!
These are the sticker letters I purchased (for $6.99, sigh) for the menu board. Once again they fit the theme pretty perfectly!
I took out the piece of glass from the frame and put it on top of the scrapbook paper I was planning on using as the background. I had this piece laying around so it saved me from having to buy it tonight. SCORE! Anyway. I traced the outline of the glass to be sure that I would have the right sized paper for the frame. Be sure to use pencil for the tracing! It's light and erasable, perfect for mistakes.
I spelled out "menu" across the top of my paper, and then put one letter down the side for each day of the week. Then I cut the paper to fit the frame.
I reassembled the picture frame and VOILA! Wrote our menu for the next week on the glass with a dry erase marker, I'm in dire need of a new marker, and folded up and hid the 2 week menu behind the menu board.
Subscribe to:
Posts (Atom)