Whoa! Friday Fives! That sounds fun! What is that?! One of the many ideas I've come up with on my break. Here it is. Remember how I was posting a massive list of tips and tricks every so often? Theyre gone! Yep, G-O-N-E, gone. Sad right? No! Because the Friday Fives are going to be replacing them! No longer will you have to sort through a laundry list of tips and tricks. Every Friday, I will be posting a list of 5 new tips and tricks for making your life easier! They'll range in categories from cooking to cleaning, to parenting and everything in between. And as always, if you have any you would like to share, send them in!
Here's our very first batch of Friday Fives:
1: When cleaning your windows, instead of wiping with a paper towel or a microfiber cloth, use a crumbled up piece of newspaper. It works like a charm to prevent streaks!
2. Use conditioner to shave your legs. Not only is it cheaper, but it moisturizes more, meaning your legs wont feel dry and itchy afterwards.
3. To keep potatoes from budding, throw an apple in the bag with the potatoes.
4. Store sheet sets in their matching pillow case. It saves room and makes it easy to grab everything you need at once.
5. Raw potato slices contain potassium. Place a slice over your eye and watch your dark circles disappear.
Thats all for this weeks Friday Fives! Check back next Friday for more helpful tips and tricks!

Showing posts with label organinzation. Show all posts
Showing posts with label organinzation. Show all posts
Friday, April 27, 2012


Sunday, February 19, 2012
Organizing - Your Spice Cabinet

Oh man. My spice/baking cabinet was a disaster! At one point in time, it was really organized and pretty, I promise! But with finding new meals, came buying new ingredients and so this mess was born. I got so sick of having to dig through everything to find one spice, knocking over bottles and jars in the process. It needed reorganized. Badly.
A few months ago, I poured all my spices into small, 4oz I believe, mason jars. They even came with handy sticker labels. It looks a whole lot nicer than a bunch of different sized, plastic bottles, and it made them more accessible. They used to be stacked nicely, 3 tall, on the bottom shelf, you see how that went. sigh.
First I emptied EVERYTHING out of the cabinet and wiped the shelves down. Then I threw away anything that was expired, or about to expire in the next month. I had a plan in my head, but our cabinet shelves just wouldn't allow that plan. I wanted my first shelf to only be a few inches above the bottom shelf. I'm only 5'3'' so I need to keep my most commonly used stuff easily accessible, hence the spices on the bottom shelf. Having our oil bottles lay sideways was a mess. No matter how tightly you screwed the lid on, they always leaked. I needed the oil to be able to stand. I explained my plan to my husband, who was less than thrilled that I had another project for him, but he grabbed the drill and made his own holes in the sides of the cabinets for the shelf..holders? Ya know, the clear plastic pieces that stick out of the sides of the cabinet to hold the shelf in place, the shelf holders. :)
Once he had that done, I started to refill my shelves. It looks so much better! And hopefully it will stay this clean and organized!!

Saturday, February 18, 2012
Organizing - Your Bathroom Cabinet

Yep, there it is in all its glory. This photo is actually from a few months ago when I went on a massive organizational spree before my husbands return. I'm embarrassed to even show this photo! It was bad! Nothing was organized, it was all just thrown in there. I needed to fix it!
So I went to walmart and bought some baskets, 4 to be exact, at $6.99 a piece. Then I traveled to www.organize.com in the hopes of finding a way to store my flat iron, curling iron, hair dryer, ect.

I found this little gem on sale for $13.99!
Actually cleaning and organizing my cabinet didn't take too long, because I threw a ton of crap out! Those million mini bottles of body wash and lotion that you get every year for christmas? Ive had them for YEARS. I kept 1 for my "ready travel kit", 1 for the guest bathroom, which we always keep stocked with toiletries anyway, and 1 for emergencies. The rest, in the garbage. THAT cleared up a ton of space.
I categorized my baskets into "hair care", "first aid/medicine" "feminine care" and "extras". The extras bin holds extra tubes of toothpaste, mouthwash, floss, loofahs, ect.

I'm amazed at how much better the cabinet looks, and the fact that it STILL looks this way! It just goes to show how a few baskets can go a long way in making your space more manageable and appealing!
Chalkboard Baskets

I love being organized. I love labels. And I love everything having it's own place to call home, and being IN that home. My OCD love this part of me. Remember how back at the menu board post I said how I was trying to get the refrigerator cleaned up? Well I am sick of bags of onions and russet, red, and sweet potatoes uglifying (is that even a word? no. I just made it one) the top of my refrigerator. I wanted needed a way to organize! I found these lovely chalkboard baskets, as seen above, at target for $39.99. The exact same amount I pay for 240 size 3 diapers. There was no way in H-E-double hockey sticks I was paying $40 for a basket I knew I could make myself! So after my target trip I made a trip to Michaels to find some materials.


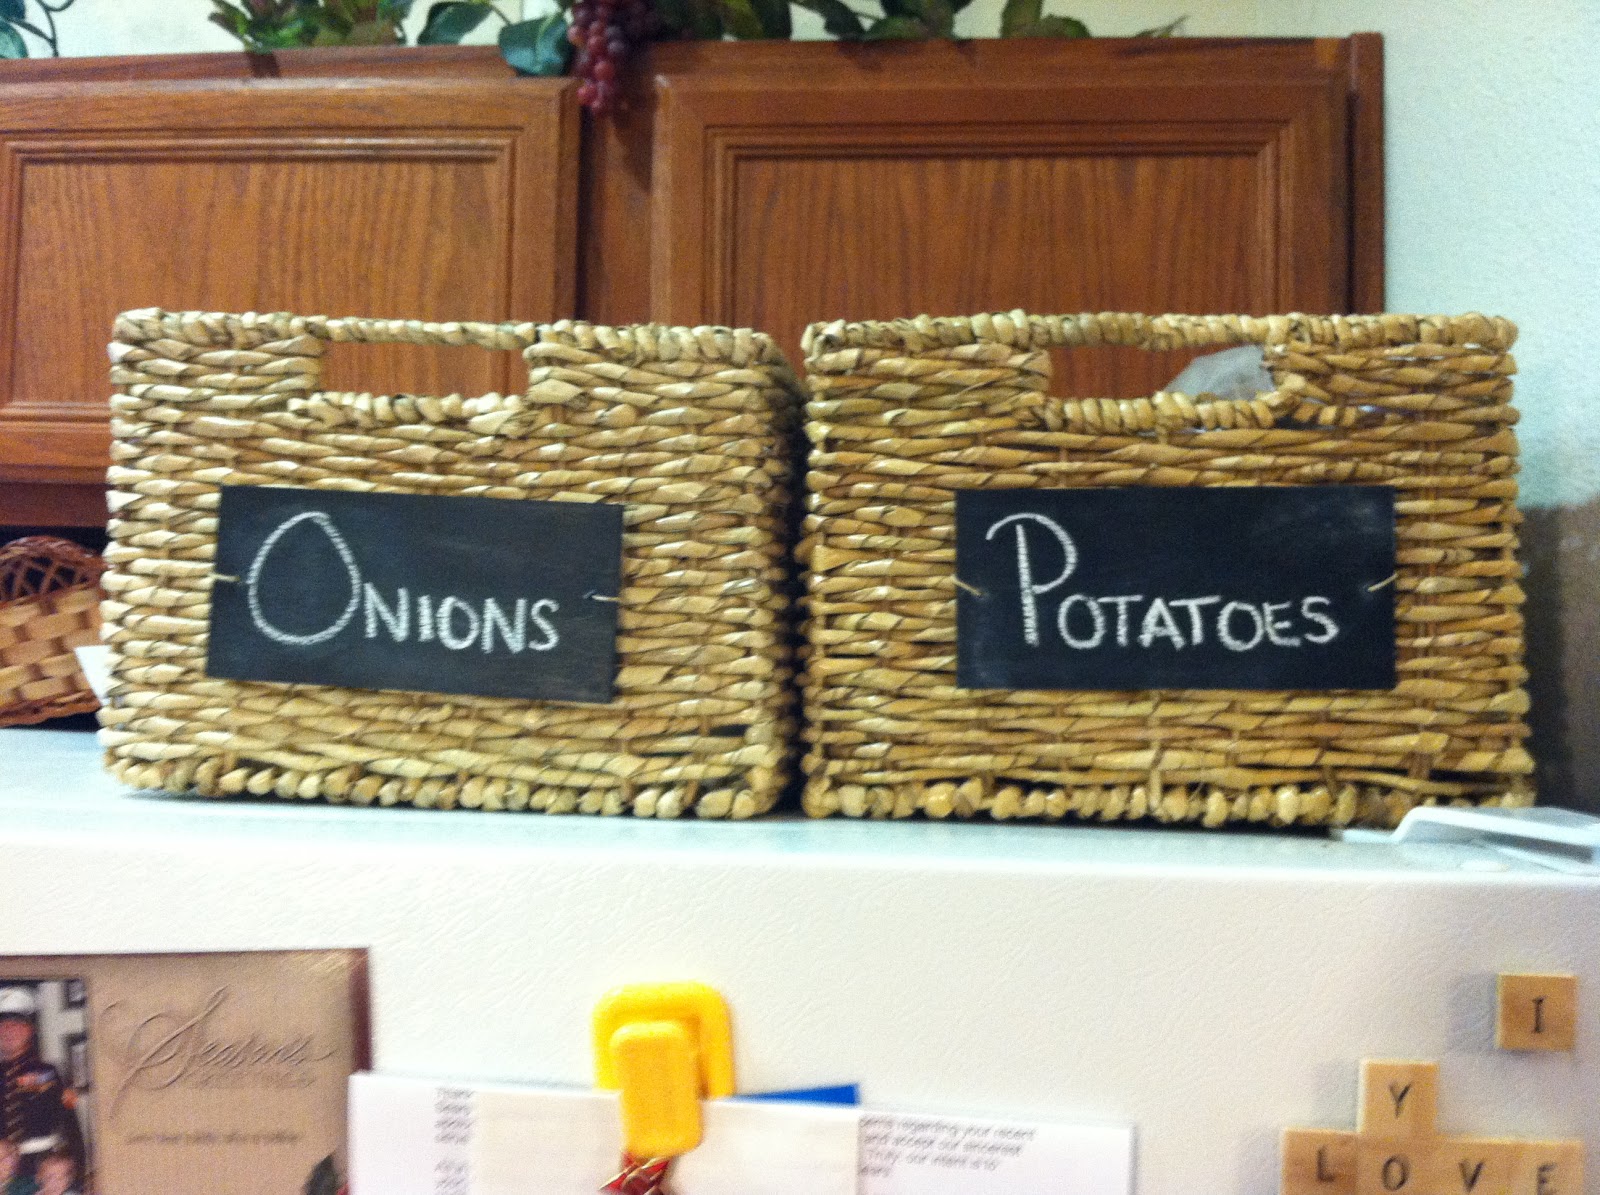
BAM! Chalkboard baskets! Target wanted $40 for just one basket. I made 2 chalkboard baskets for well under $40!
Crafty mommy - 1 Overpriced Store - 0
winning.
Subscribe to:
Posts (Atom)